Showing posts with label quilts. Show all posts

Wednesday, 19 August 2015

Festival of Quilts

I went to the Festival of Quilts this year and barely managed not to touch the quilts: The textures were so exciting, though!

Here are some images from the competition they ran. I'll also upload a blog about my chevron quilt. Only the bias binding to go and I got some great wadding tips from the festival too. Thank goodness for Doughty's!


Look closely at this image of a bicycle. It's a lovely example of strip quilting and what you can do with quilts when a group of people comes together!

Tuesday, 17 February 2015

My favourite tutorials

I like Hey Quilty best for tutorials because it is filmed like a TV show. 
They have 2 people discussing a subject, lots of text visuals, quilt examples and explanations. The audio, video and close-ups are great. The lighting is also very bright. The presenter (usually Mary Fons) speaks clearly and is also very clear about their techniques and what you have to do to achieve their results.

Here is an example of a brilliant Hey Quilty introduction to making your own bias binding 

Thursday, 5 February 2015

Sewing machine dissection

It feels very intimate showing you the inside of my sewing machine all laid bare. 
It's very dusty in there but I've just given it a little spring clean so we should be good to go very soon!

So this is how we get some cotton out when the machine is trying to eat it and turn you into cotton as well! (I'm getting an old Superman visual here *spoiler alert - when Lex Luthor has the machine in the cave and they get covered in tin foil).


LET'S OPEN HER UP!

Grab yourself a 5p piece or similar. A screwdriver is not going to do it! 

It didn't fit!!! Use something everyone has about the house instead - check in the sofa...

Unscrew the 2 bolts on the sewing machine with the 5p / 5 centimes. Keep them safe!


Take the panel off and have a look inside. I took out 3 big bits of fluff so it's good to have a look inside every so often just as a bit of an MOT, although some shops will do this for you. 

N.B. If you have bought your machine from a retail outlet you can go back to them with any problems. John Lewis is quite good at that sort of thing, but if you can go back to the Brother/Singer people they can help you too.
  

Look at that! So much cotton rammed in his mouth! I wonder if they wanted it to look like that when they designed the machine, or whether it's random? Right, I'm off to get my tweezers :)

Found the tweezers! Bish bash bosh, job done.


Look at all those strands that were tightening up inside to try and chew up all my fabric :( 


Pondering: Bit of a distraction but, now that the machine is fixed and as my yellow bias binding has just arrived in the post, I could also finish off another quilt while I'm at it. Pondering on whether I should try my luck with the new quilt foot or if I should get my sewing machine MOT-tested in case there is a bigger problem there. It's an old machine and has been a bit finickety but it's not like all sewing machines AREN'T finickety...hmm... Agh! Don't want to spend a small amount on a machine just for now. Some people save up for cars - me, I save up for a fancy new Singer sewing machine. But then there's always going back to my grandma's old 1950s Singer which fits into a table and has a knee handle! I'll show you that sometime. It's cool. It's currently my bedside table so very practical!

Friday, 30 January 2015

PART FOUR: Chevron style St. Clements quilt

///I'm back from the land of Bedfordshire and up for another afternoon's quilting. I had planned meeting people for an afternoon of French chat and Galette des Rois eating but I got snowed in. Oh well, good excuse to do some more quilting///

PINNING THE COLUMNS TOGETHER

Put the columns together (right sides together). Make sure that the horizontal seams are lined up because it will look better later on, but you also need to make sure that the points of the triangles match as well.
Matching horizontal seams and triangle points
 
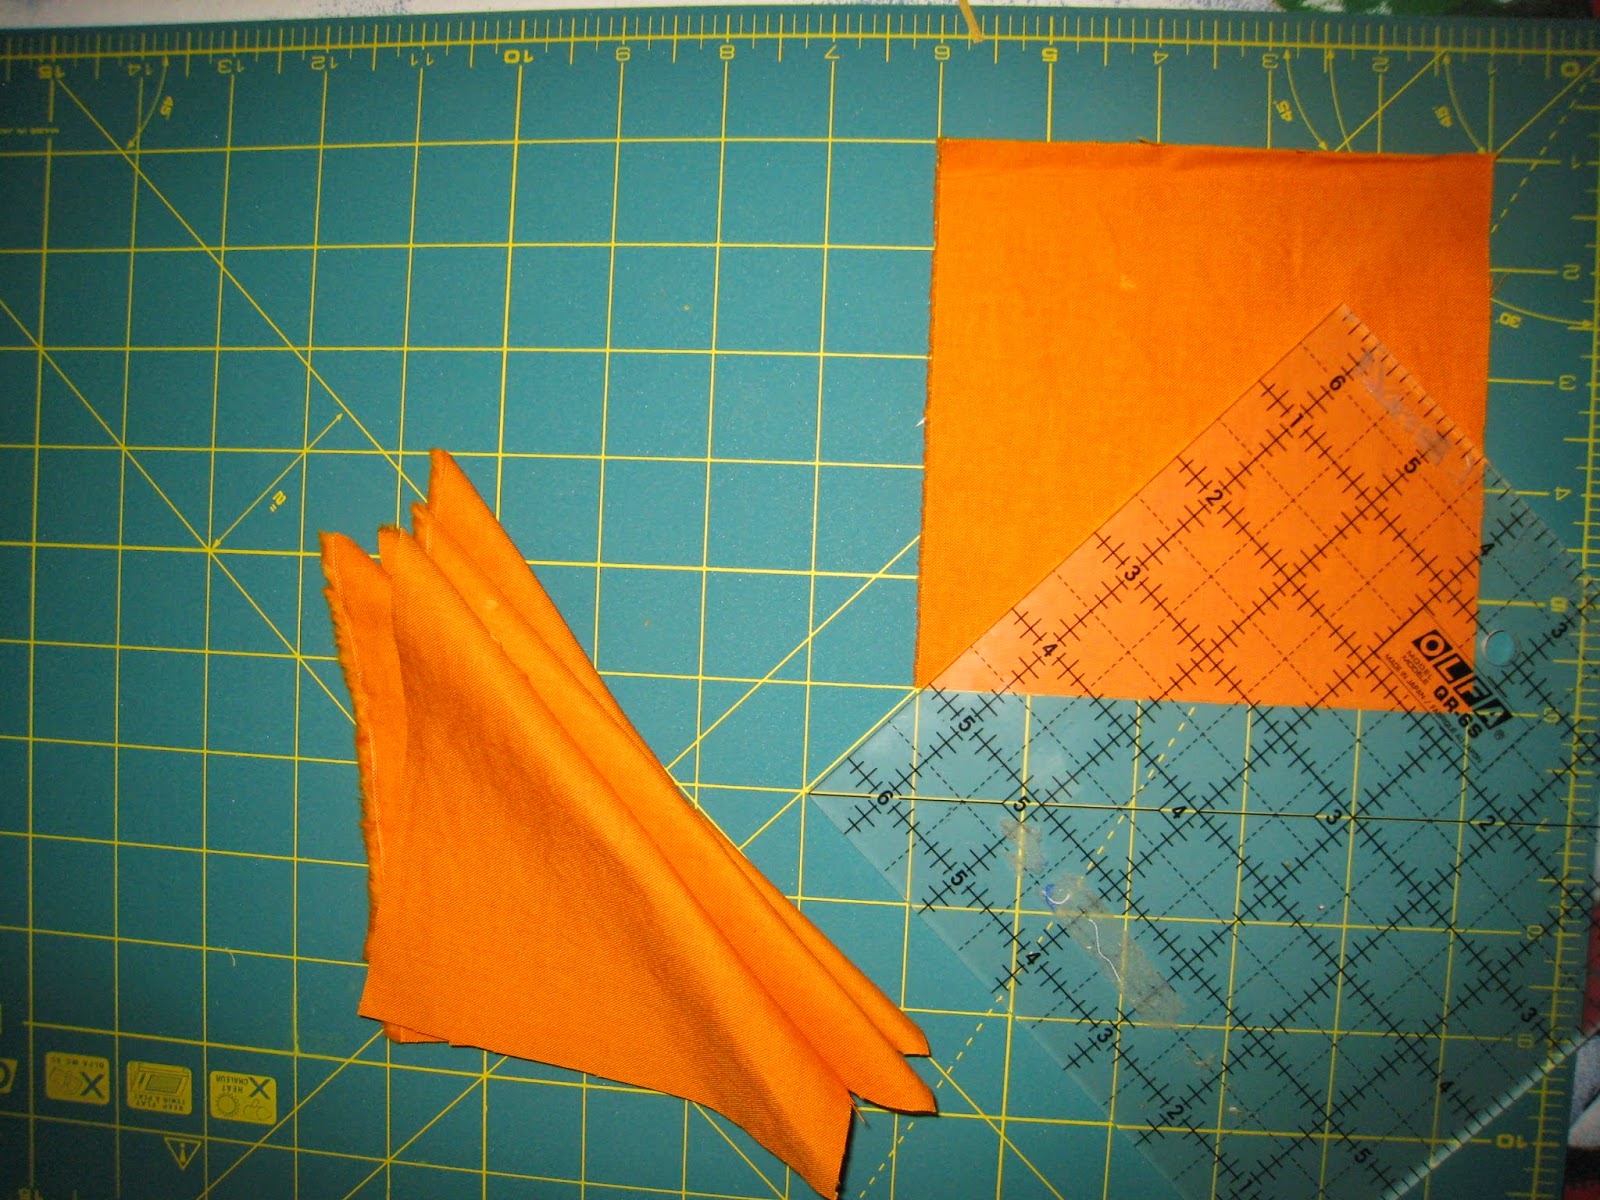
I used a ruler to make a straight edge which gives me an idea of what the sewing will look like when I'm done. It then means that I can immediately pin the fabric and draw a line, which I will sew along.

I am double-checking that tacked seam in this picture. It didn't seem (fighting the urge to pun here) right so I drew a line a bit nearer the edge to make a better finish.

Pinned, tacked and the guideline has been drawn
  

TACKING AND SEWING COLUMNS TOGETHER

I tacked (left image: in white) and drew a line, in biro, to indicate more clearly where I should machine sew.

N.B. better to tack in a different colour thread if you has it as it's easier to unpick later! (see right image)


When you sew, sometimes the flappy triangle bits will get in the way. (I haven't cut them off as yet as, earlier, they helped me to see what the triangles should be in line with). 
To make the flappy bits flat, make sure your needle is down, then click the foot up and just flatten the flappy bits the right way, then click the foot back down.

Needle down, foot goes up
Organise flappy bits
Foot down, continue sewing

EXAMPLES OF SEWING CHEVRONS

Here are some examples of the fact that it doesn't always turn out right first time and that sometimes you need to check and check again to get a good result. Instagram is testament to this - just look up #unpicking if you ever feel overwhelmed about the whole thing!
This tacking seemed to work well but I knew I needed to make the seam allowance a bit bigger so I got a nice point on the inside of the chevron
This one went completely wonky so I undid the bottom, jiggled it about a bit and retacked and stitched it so it looked better.

STOP! In the name of Quilts! What on Earth is that hole doing there?!

Random unsewn line of sewing within the quilt

TIP: Make sure that the bobbin is full of cotton. When quilting, you can sew a whole line and not realise quarter of the way through that your bobbin thread has gone. To me, it looked as though the sewing was done because the top thread was there, but actually, it hadn't been sewn because the bobbin thread wasn't there. Hence, I had a hole in my quilt which was tricky - but not impossible - to correct. 
See my later blog post on WHIP STITCH

So you've sewn two columns together, and another two columns together. Now you want to put each set of two columns together. Easy peasy. Just do the same as before! Right sides facing and just make sure it's the right way up and that the correct patterns are matching.


Almost finished. A last double-check before I sew on my last column. I just checked the size of my quilt against the last one I made. It's a wee bit too small so I'm going to add a border of orange fabric to make it bigger with minimal work, and then I'll sew some yellow bias binding around the edges. This also gives a nice finish to the quilt and brings all those lovely colours together. 


 It's the final quilt seam... Doodle oo doo doodle ooh doo doo doodle ooh doo doo, nearly the final quilt seam!

THEEEEEN - Iron your seams! 
I always feel like when you finally get to iron the seams you must've done a load of work and need a reward. I had a cup of tea and a biscuit after this one. It's snowing too so just making quilts made me feel that little bit warmer and cosier. My chickens didn't think so, though. "Sorry Phyllis! I don't control the weather."


HAPPY QUILTING!

Thursday, 22 January 2015

PART ONE: Chevron style St.Clement's quilt

So a couple of weeks back I was doodling this with a vague notion of orange and yellow fabrics, a design tip (from @heyquilty ) that the bottom triangles of a pattern look good if they are a slightly different colour to the top triangles, and a chevron style. It's amazing that such a simple idea can germinate into a big project but I'm up to the ironing of column seams so almost done now!

CHOOSING & CUTTING OUT YOUR FABRIC
Here is how I began this quilt, full of the joys of Spring, because I had just received my Olfa rotary cutter in the post!
Fabric choice note: Choose a good sturdy fabric - 100% cotton works well. Wash before cutting. I zigzagged the edges so they didn't get too raggedy in the washing machine. Make sure you know how to wash it first. 30 degree wash is great. 
--> Take note of the fabric patterns you're using. I had to cut the stripey fabric a certain way for a certain space on the quilt, otherwise the stripes go the wrong way.


It's like a dream come true. Just like they said on the YouTube tutorial, it cuts through two pieces of fabric, you can cut it to exact measurements. Granted, silky materials are always tricky but my 100% cotton was fab with it and It's a nice sturdy material for my quilt. I started to regret the (beautifully patterned) yellow stripey, slippy polycotton which started fraying a bit at the edges but it'lI be fine.


QUILT MATHS
So I counted out how many triangles I wanted ...
--> 28 triangles per column 
--> Mine has 5 columns x 8 rows so 140 triangles in total 
I wish they did an app for quilt maths! I just cut a load of squares this time and cut out more as I went along. I decided to stop at 8 rows because I realised how big a project it was! Lots of sewing and my first time quilting in triangles - but, one step at a time! - I now have loads of extra triangles for scrap quilts anyway!

HOWEVER... For the sake of cutting efficiency I drew you a little picture. 


For 3 fabrics in COLOUR 1, see the purple chevrons
For 2 fabrics in COLOUR 2, see pink chevrons.
The amount of triangles also works the same if you want 2 fabrics in COLOUR 1, obviously 
--- My teacher-sister would be so proud!
You might just want to use 2 fabrics to make an obvious monochrome or something like that.

N.B. Each chevron is made of 4 triangles so divide the fabrics as you like into multiples of 4. If you have lots of offcuts you may want all different colour chevrons. 
I did mine quite off-the-cuff because I wasn't sure where I was going with it exactly so I just made sure I had 4 triangles of a certain fabric for the chevron. It depends how you want to play it. Play around with triangle placements on the floor of your sewing room, dining room, kitchen, wherever - wherever most annoys my parents tends to be the place I do that sort of stuff (my sewing room is not quite big enough for a whole quilt of this size, but the living room is perfect!)

CUTTING OUT TRIANGLES 
With the Olfa rotary cutter I simply cut out 6' squares and then cut them in half (so for 24 triangles just cut out 12 squares and cut them in half to make 24 triangles). I used the guideline measurements on the mat and perspex square to guide me. It took a while but so much faster than pinking shears!

SEAM ALLOWANCE: The seam allowance will be about 3/4cm - I sometimes use 1.5cm. As long as all the triangles use the same seam allowance, you'll be fine.


This is, I think, the first fun part - starting to see what the eventual quilt will look like! 

DESIGN PONDERINGS...
I wanted the quilt to have alternating colours. As you can see below: it's yellow, orange, yellow, orange, yellow, orange, yellow, orange. The stripes were tricky but I think they look good even if they don't match exactly. Feel free to swap things around. You can see in the picture below that I blatantly used 2 stripe chevrons near each other, then 2 mustard chevrons together. It really strengthens the print.

I used 1 yellow, patterned fabric + 1 yellow block colour fabric and 2 orange, patterned fabrics+ 1 orange block colour. It makes the quilt seem less fussy and the orange fabrics look quite different and contrasted.

Placing my quilt triangles

AND THAT IS THE END OF PART ONE!

Unpicking is the worst

Three times in an hour. Maybe listening to Wicked and Frozen whilst quilting isn't the best idea.

Oh well.

Not like it's the end of the world.

I'll just - let it go! Let it gooo! Can't unpick anymore! Let it go, let it gooo I'll concentrate some more! Here I sit at the sewing machine.. For another hoour! I'll finish this quilt easily!


Thursday, 8 January 2015

Passion quilt

I’ve started making a Passion Quilt – no, not like that you saucy reader! 

I’m quite laid back so, sometimes, I feel like maybe I don’t care. I am passionate about lots of things yet, sometimes, I forget what they are. So I’m making a Passion Quilt: something tangible which reminds me that I do care and what I care about.


I thought about this today because something in the news shocked me and made me think about how important our rights are and how little it might take to topple this relatively good, free, safe & democratic country we occupy. Couple that with the fact that I recently became interested in Craftivism ...

CRAFT + ACTIVISM = CRAFTIVISM

(and it got me pondering and craftivising)

Briefly, it’s the idea that:

CRAFT + ACTIVISM = A BETTER WORLD

Crafting a message for the world is an active way of approaching issues and doing something in a small way. This means that a meaningful message gets shared which might change the public’s perception of the world. Whether it’s:

-                                        -  a piece of knitting that brightens up a park bench

-                                        -  an embroidered quote tied to a public railing

Image: https://hannamade.wordpress.com/tag/craftivism/


--  OR bunting which says a simple message, like “breathe”,  in a public space. 
Image: http://craftivist-collective.com/all/everyone-wanted-to-stroke-hug-our-wellbeing-soft-sculpture-bunting-words-made-for-decoration/
Craftivist Collective puts it better: ‘Very simply, craftivism is activism that uses craft! Betsy Greer coined the term in 2003, and she defines it as “a way of looking at life where voicing opinions through creativity makes your voice stronger, your compassion deeper and your quest for justice more infinite.” But it’s not a new concept.

So this is my act of “Craftivism” but it’s also an autoreminder that, in some part of me, I do care about freedom of speech and a person’s right not to be killed for expressing themselves and that is vital.

Image copyright: Monstereyeseventsblog