Showing posts with label crochet. Show all posts

Thursday, 2 April 2015

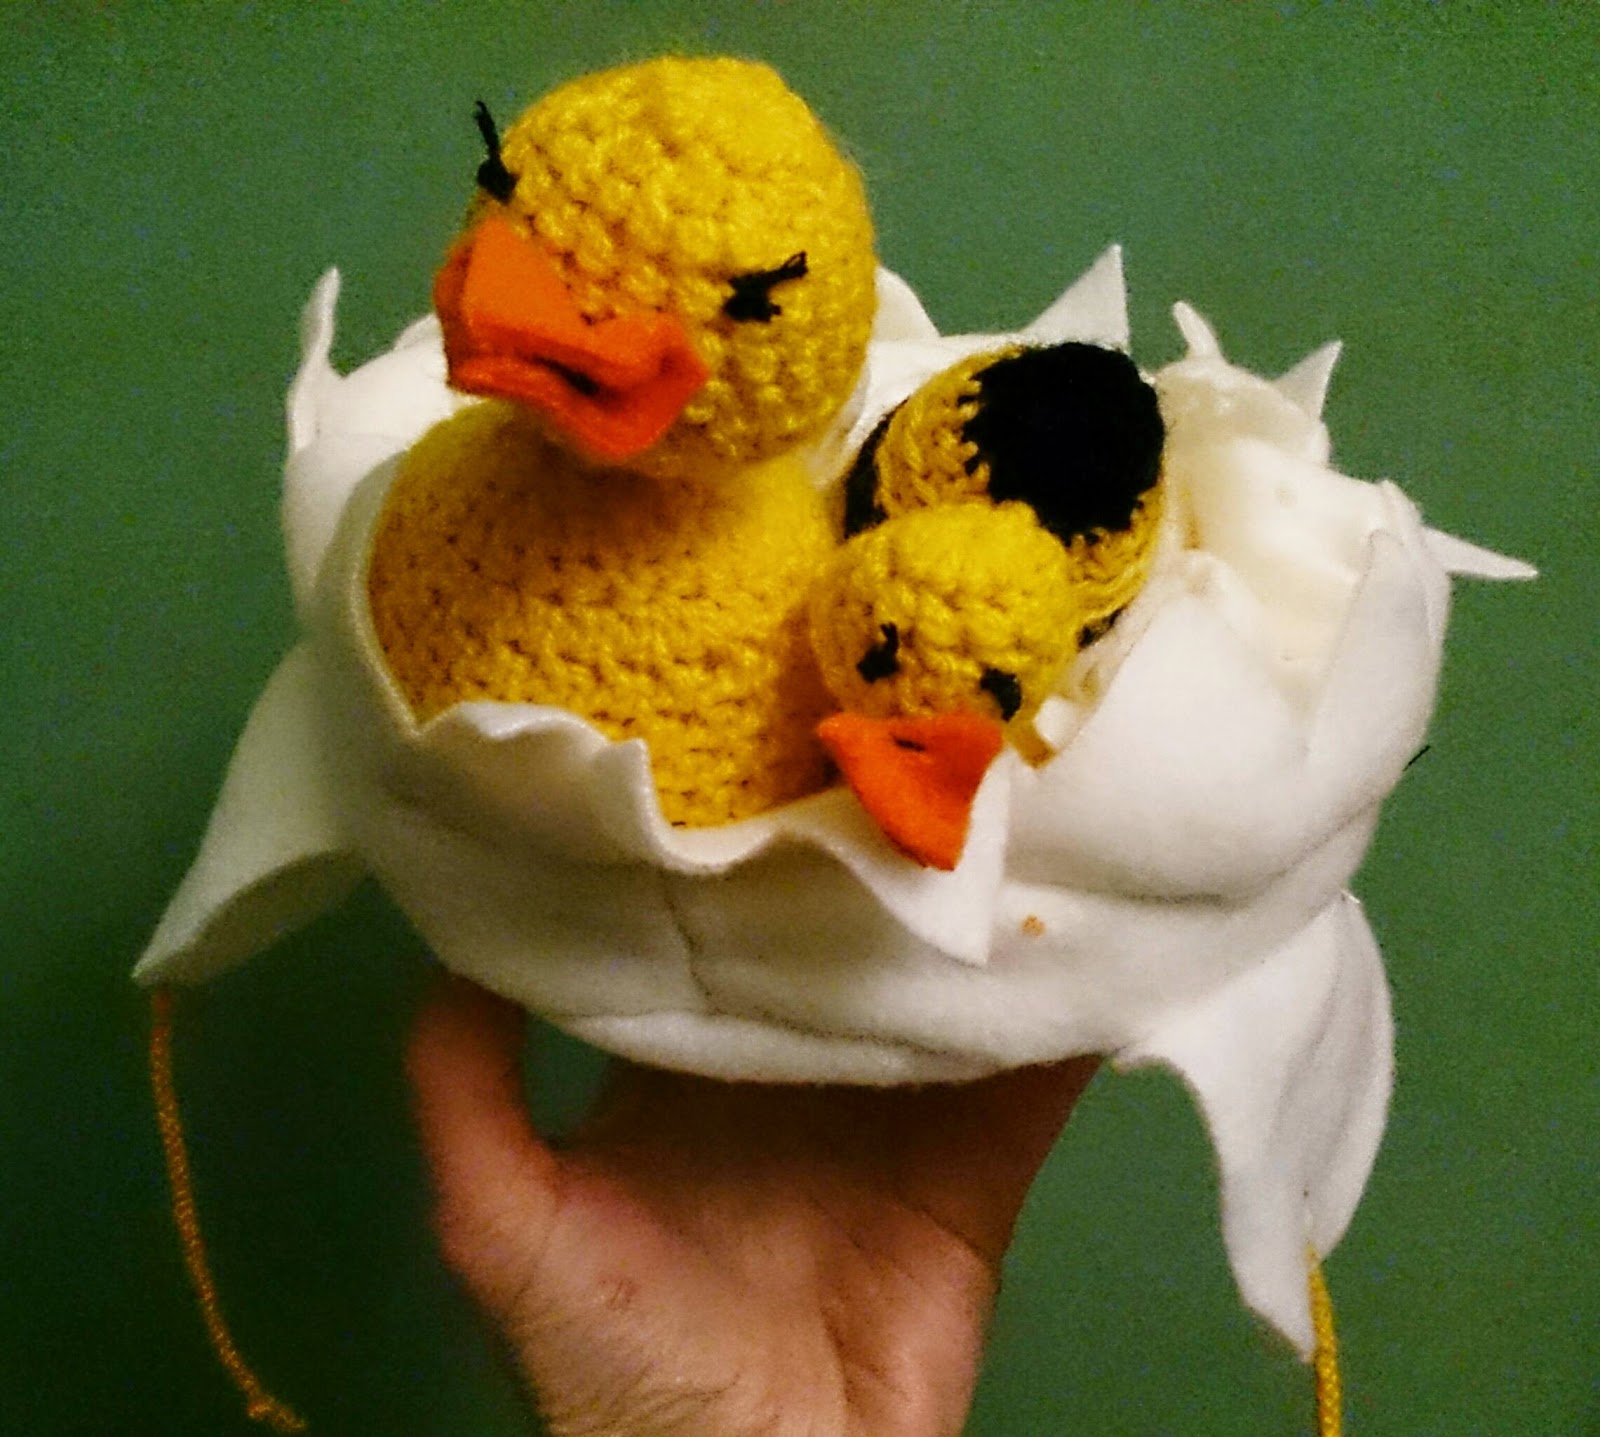
Easter bonnet

I made this little Easter hat for my niece.
It's made of fleece and crocheted eggs and chicks with more fleece to bulk it out. I also added yellow braids. Bit of a late-night finisher for the nursery parade but hopefully it was comfy for a little'un!

Saturday, 17 January 2015

MY BLOODY VALENTINE

I have been making some flyers for this great crochet workshop on Thursday 12th February at 6.30pm 


It'll be really fun. I'll be showing you how to crochet an eyeball and generally having a fun time and drinking coffee/tea and having cake in the cosy, quirky surroundings of Cherry Reds cafe on John Bright Street in Birmingham, UK.

I'll be providing wool, stuffing and crochet hooks! There are 10 places available

This'll be the perfect alternative Valentine's crafting! Hearts can be fun but gory eyeballs are wicked!


Friday, 2 January 2015

Crochet your own 3D detached, monster eyeball

Crochet your own 3D detached, monster eyeball

I woke up this morning and had no idea that, by tonight, I'd have a bit of a monster eyeball product line going on in my kitchen. I think my parents must imagine I'm having a nervous breakdown but sometimes it's just fun to do something for no reason. So... eyeballs.

In my previous blog post I showed you how to make a slightly 3D eyeball 

This time I have added colour to the iris and made it 3D with an optic nerve for good measure. The great thing about this is how simple it is to make.

The finished product.


MATERIALS


This is what you're going to need to make your 3D monster eye. 

White wool (for the whites of the eye)
Green wool (for the iris)
Black wool (for the pupil)
100% polyester stuffing (I used some from a cheap cushion I had lying around)

**Red wool if you want a red optic nerve or blood vessels in your monster eye!**

Size 4.00 crochet hook
Scissors
Needle


MAKING EYEBALLS 

Make your pupil and iris by follow my previous 2D eye blog post and simply substitute white wool for an iris colour wool). I'm still not sure if I prefer one row of colour (for the iris) or two so have a play and see what you think works best.

Slip the white wool into your iris coloured circle and crochet around it. I have added a stitch for every crochet. Then just crochet around the iris 5 times and it turns into a sphere really easily. If you add some polyester stuffing as you go then you will get a feel for the shape as well. Change the wool colour to red and do about 3 rows of red skipping a stitch after every crochet so that the sphere closes. Add more stuffing if it looks saggy. 

Once your sphere of crocheting is closed do a chain of about 15 stitches to create the optic nerve. If you are feeling creative you could sew red wool or thread from the iris to create blood vessels in the eye.


Here is my little production line. Having made up all the pupils I wanted I added coloured irises, then made a sphere of white wool crocheting which turned them into 3D eyeballs. You will see that the colour parts in this picture still have their slipknot so that I could continue crocheting with white wool outside the irises.


I think it is quite satisfying making a production line because I feel like I'm making them much faster than if I did one eyeball at a time. It also means I can tidy up the different balls of wool as I go.


** Having taken some advice, from my sister, I have changed the optic nerve colour to red which makes it look more realistic! So after doing 5 rounds of the white wool for the whites of the eye, I have changed wool colour to red for 3 rounds and made it into a tail of 15 stitches.


Thursday, 1 January 2015

Monster eye images

This is my first go so expect better in future. Does exactly what it says on the tin. I even added an optic nerve. I'm getting a tripod soon so I'll try and do a video tutorial. Very exciting stuff! 


Crocheting Monster Eyes!

These 2D monster eyes are a bit of a lark and simple to do. I'm going to make some 3D ones too ( http://monstereyesevents.blogspot.co.uk/2015/01/crochet-your-own-3d-detached-monster.html ), for cuddly sock monsters! (I will put the tutorial in another blog post)

Materials

You'll need two colours of wool. Just whatever you have lying around will be fine as this won't take much wool. You might want to do another colour if you want monsters with crazy red eyes or blue eyes or glow-in-the-dark eyes! 

I've also used a size 5.00 crochet hook.


CROCHET YOUR SPOOKY EYEBALL

Step 1: I started with a slip knot and crocheted a chain of 4 stitches.


Step 2: As you make your 5th chain stitch, push the crochet hook (with the wool on) through the hole like in this picture and pull it back to create a circle.

Step 3: As you now have a circle, crochet into the next stitch in the circle and crochet into each stitch all the way around. If it gets a bit tight add another chain stitch and crochet into the next chain of the circle. Go around the circle as many times as you'd like to make the pupil of your monster eye.


Step 4: Add another colour. I'm using white as I want monochrome eyes but you can do whatever colour you want. I simply catch the last black chain on my hook and get the end of the white wool and pull it through, making sure the white wool is tight.
Step 5: Now that the white wool is part of your eye, you can continue what you were doing with the black wool circle. Crochet the white wool into the next stitch and, if the circle gets a bit too tight simply make another chain stitch and crochet into the next stitch in the black circle. 


Step 6: Continue with the white until it's as wide as you'd like. If you'd used blue/red for an iris, you could add the white of the eye in the same way at this stage.


Step 7: Poke your hook through the white crochet and pull those tricky wool strands to the back of the eye. Do the same with the black wool strands, making sure you pull them through the black crochet so the colour lines don't merge.

N.B. To make your monster's eye a little bit more 3D don't add extra stitches. Simply leave the crochet circle to get tighter as you crochet each circle and the eye will maintain a nice boggly shape.

Step 8: WELL DONE! You have made a monster eye. If you make another one, attach both eyes to a big sock (odd socks are best as I always think they might be a bit lonely in the odd sock bag) and stuff it with polyester stuffing - you can get cheap cushions from the rag markets, warehouses or simply use whatever offcuts of fabric you have knocking around (as long as they are cut up small). Sew up the bottom to keep the stuffing in and you can use smaller socks for arms!

Notes: My monster eye has a lovely 3D feel to it, but if you'd like a more flat effect eye then have a peek at this online tutorial to crochet a magic circle with double crochet - https://www.youtube.com/watch?v=3PmaQJbyVt0